
Windows: ocultar archivos y carpetas
En sistemas multiusuario como Windows, puede ser necesario ocultar carpetas y archivos para evitar que otros usuarios accedan a ellos.
Ocultar rápidamente archivos y carpetas
La solución más simple es establecer el llamado atributo oculto.
- Para hacer esto, haga clic derecho en el archivo o carpeta relevante y vaya a "Propiedades".
- Marque la casilla junto a "Oculto" y confirme con "Aplicar".
Ocultar archivos y carpetas de forma segura a ciertos usuarios
Desafortunadamente, cualquier usuario puede pasar por alto la medida mencionada anteriormente, ya que el explorador de archivos ofrece la posibilidad de mostrar archivos o carpetas ocultos. Con las siguientes instrucciones puede regular el acceso de manera mucho más efectiva. Así es como funciona:
- Simplemente mueva los archivos y carpetas para ocultarlos en una carpeta colectiva, cuyo acceso puede regular.
- Ahora haga clic derecho en la carpeta y seleccione la opción "Propiedades" en el menú contextual.
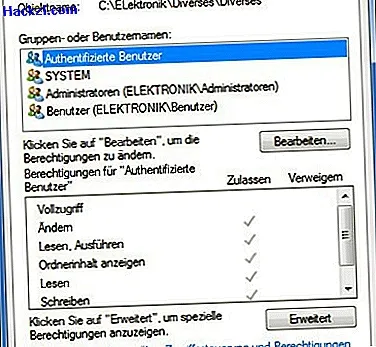
- En la pestaña "Seguridad", verá los grupos de usuarios en "Nombres de grupos y usuarios". Si hace clic en uno específico, puede ver qué derechos tiene el usuario en el cuadro a continuación.
- Ahora puede crear un nuevo usuario cuyos derechos desea restringir o revocar uno existente.
Agregue usuarios cuyo acceso desea restringir
Si desea determinar un nuevo usuario, primero proceda de la siguiente manera:
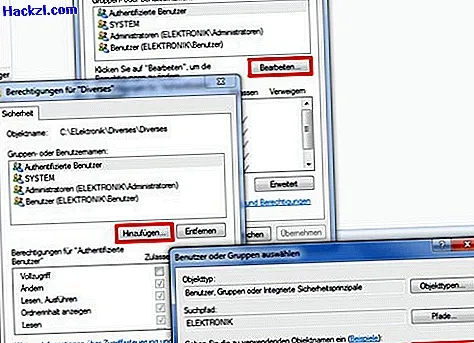
- Ahora haga clic en el botón [Editar] y luego en el botón [Agregar].
- En la ventana "Seleccionar usuarios o grupos", ingrese el nombre del usuario, por ejemplo, "Sven", y luego haga clic en el botón [Comprobar nombre] y luego en el botón [Aceptar].
Revocar los derechos de los usuarios a carpetas y archivos
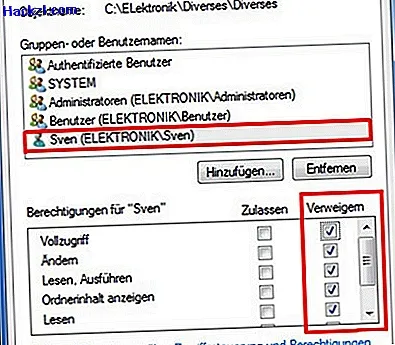
- El usuario "Sven" ahora está en la lista que ya conoce desde el punto 1. Ahora marque al usuario "Sven" simplemente haciendo clic en su entrada de nombre.
- En la ventana inferior "Autorizaciones para 'Sven'" ahora puede ver la configuración de autorización actual. Para eliminar todo el acceso al directorio de Sven, haga clic en la columna "Denegar" en la casilla de verificación "Acceso total" y luego aplique la configuración haciendo clic en el botón [Aplicar].
- Para retirar el acceso a otros usuarios, simplemente haga clic en el botón [Agregar] nuevamente y comience nuevamente con el paso 2.
- Haga clic en el botón [Aceptar] si no desea agregar más usuarios o grupos a la lista.
Tenga en cuenta que la asignación de derechos en Windows es mucho más compleja de lo que se muestra en este pequeño ejemplo. Cualquier usuario con derechos administrativos puede deshacer la configuración especificada anteriormente; sin embargo, esto se aplica a todas las configuraciones. Por ejemplo, si desea configurar la asignación de derechos restrictivos en la red de una pequeña empresa, es importante abordar este tema con mayor intensidad.
Lea cómo proteger una carpeta con una contraseña en Windows 7 aquí.